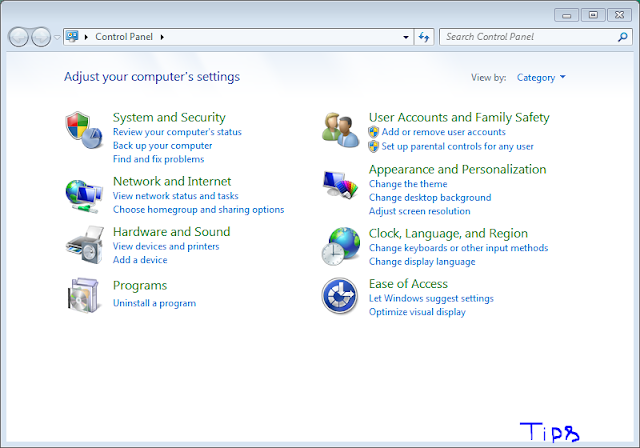
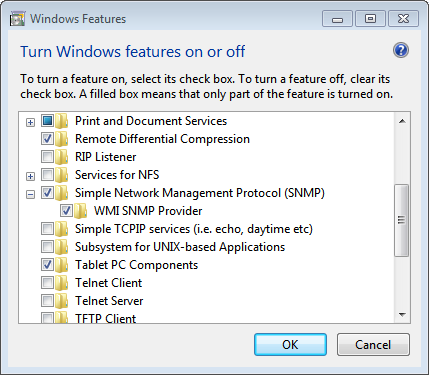
Bring up Control Panel and go to “Programs and Features” (or “Add/Remove Programs” in older versions) and select “Turn Windows Features on or off” (“Add/Remove Windows Components” it’s on the left side button bar). Simple Network Management Protocol will be listed there (hiding under Management and Monitoring tools in older versions of Windows) and you can simply check the box and continue on to install it. No reboot or anything is required.
1)Go to Control Panel
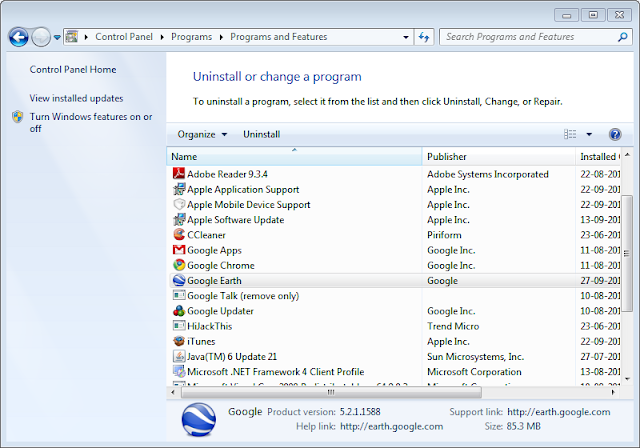
2)Cick on Uninstall a Program(if u r in tile View then select programs and features)
3)Click on Turn Windows Features On/Off and select SNMP option to be enabled and click ok the software installs and after a restart it will be ready to use.
And to use the SNMP service for sending trap messages
- Type services.msc in the start search box and click on it
- In the services select the SNMP service and right click on it to properties
- Click on the TRAP tab
- Select Community Name Box and in it tyep the community name
- Click on add to list and apply it.

 The next step is to jump into services and allow access to the public community as read-only, emulating the settings we did for Linux before. Right-click on Computer (or My Computer) and select Manage. At the bottom you will find the services snap in. Scroll down and open up the SNMP service and edit the Security tab, adding the public entry and allowing access from all hosts (or you could enter in the one you are using to monitor it from if you like).
On versions of windows prior to Vista you will need to go to the Firewall and manually add an exception to allow traffic on port 161/UDP. Once you are done you should have access across the network.