WinBox is a very convenient way to configureMikroTik Router Operating System (RouterOS). Its user-friendly graphical interface makes it easy and fast. Note that this is a Remote Configuration window. The software itself is a command line style Operating System.
Step 01: First of all need to login to Microtik router with default ip/connect to port no 3 with UTP cable.


Step02: Here you will shows ip & MAC address ; just click here

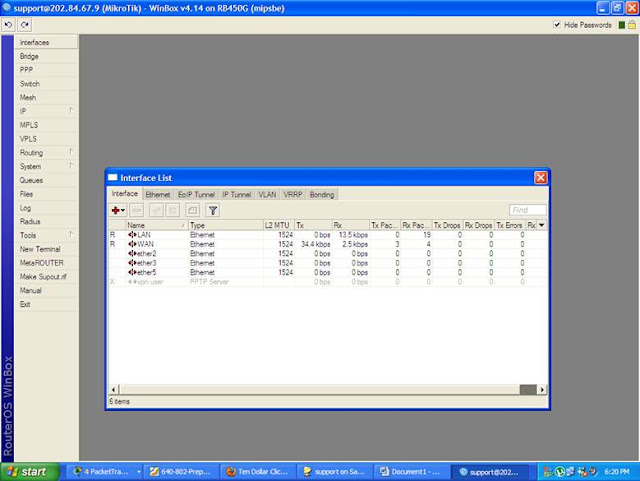
Step03:How many interface have you can see here in Router;
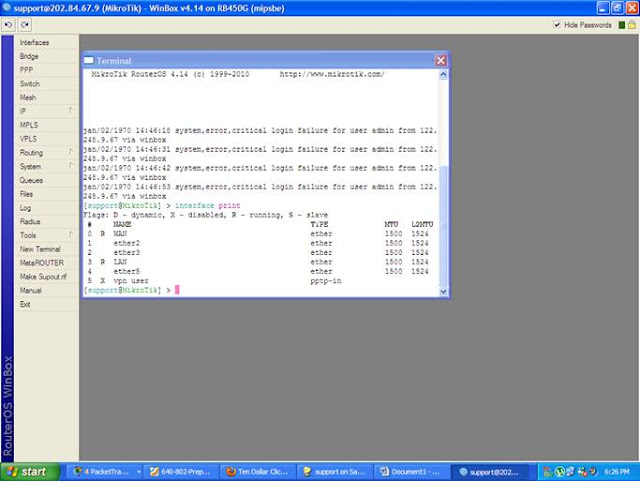
Step04:For shown interface : Go to terminal then " interface print" in command line
Step05: After login need to change PORT name like LAN ,WAN, or PUBLIC , LOCAL for your own decision.

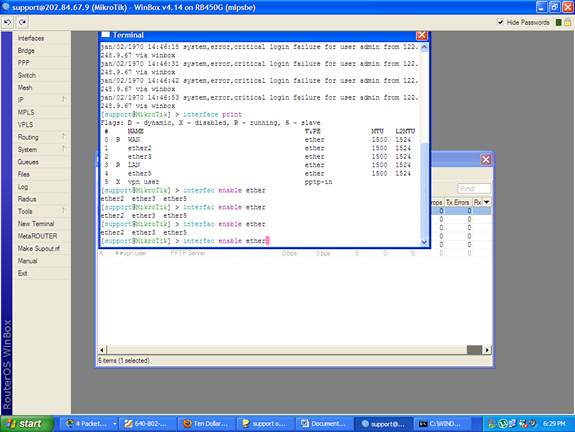
Step06: Need to enable interface
Step 07: MikroTik Router allows you to easily perform user management. You can add, remove users, set names, groups, and passwords.

Step08: for shows ip address Type: "ip address print"

Step09:


Step11: Just type ip address to this box and then click ok.

Step12: Interface should be which port you connect to Router.


Step10: Assign IP address : go ip address
Step 01: First of all need to login to Microtik router with default ip/connect to port no 3 with UTP cable.


Step02: Here you will shows ip & MAC address ; just click here

Step03:How many interface have you can see here in Router;

Step04:For shown interface : Go to terminal then " interface print" in command line

Step05: After login need to change PORT name like LAN ,WAN, or PUBLIC , LOCAL for your own decision.

Step06: Need to enable interface

Step 07: MikroTik Router allows you to easily perform user management. You can add, remove users, set names, groups, and passwords.

Step08: for shows ip address Type: "ip address print"

Step09:


Step11: Just type ip address to this box and then click ok.

Step12: Interface should be which port you connect to Router.


Step10: Assign IP address : go ip address